

By Tony Buser
3D Printer Troubleshooting Guide for Beginners
Having problems with your 3D printer? Don’t worry – 3D printers sometimes fail, but most issues are easy to fix with basic tools and a little patience. Today we’ll cover the 9 most common problems you’re likely to face while 3D printing, and teach you how to fix them in a few easy steps. You don’t need to be an expert to follow our simple 3D printer troubleshooting guide , so keep reading to get your machine back up and running today.
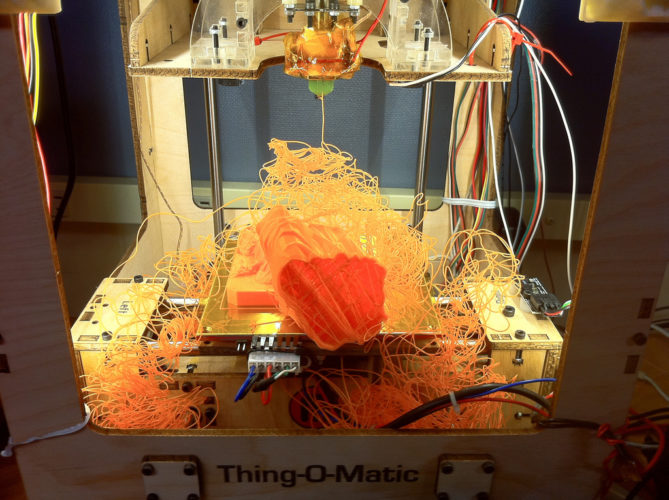
Problem #1: Clogged extruder/nozzle
At some point or another, every 3D printer user experiences a clogged extruder. Often accompanied by a horrible grinding noise, no filament is released when you initiate a print. A partially clogged nozzle may also be the cause of under extrusion. Thin layers, holes, or cracks in your finished model are all signs that your printer is under extruding.
What causes a clogged extruder? Over time, the pin-sized nozzle can get clogged with left-over filament or other particle obstruction (mostly dust). Printing at the proper temperature with high-quality filament significantly lowers your chance of jamming the nozzle, as does regular maintenance to keep the extruder clean and lubricated.
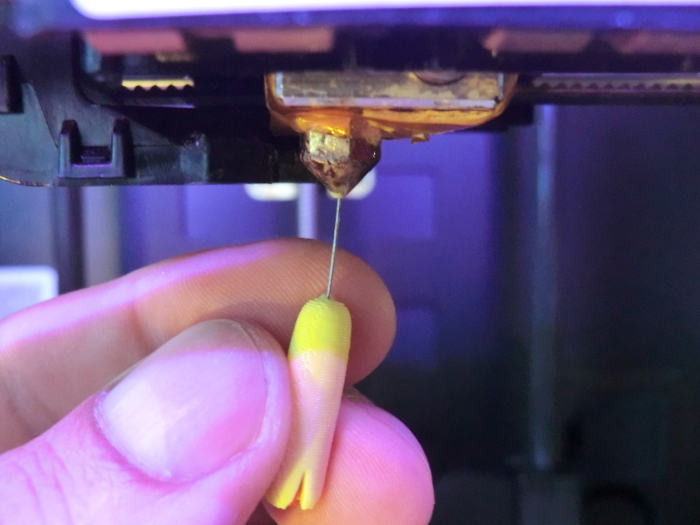
Solution 1. Remove the filament from your printer. Next, heat the extruder to the melting point of the filament you use most or that you used last. Then carefully draw a needle or other tool small enough to fit in the ~.4mm nozzle through the hole. This may take a few tries, and works best for PLA or when dust is to blame.
By Creative Tools
Solution 2. Cold pulls are another popular way to clear a clogged extruder, working best with flexible filaments like nylon. Start by heating the extruder to the temperature of the filament, then manually push as much filament through the nozzle without applying too much pressure. Then let the nozzle cool down to a temperature around 100C, after which you will pull the filament up out of the extruder. This pulls any obstruction out along with the filament. Clip this end of the filament and reload to start printing again.
If all else fails, you may need to dismantle your extruder or even soak the nozzle in a dissolving solution to remove the obstruction. Usually, though, one of the above methods works well.
Problem #2: Filament won’t stick to the print bed
Do the first layers of your model end up a jumbled mess instead of sticking to the print bed? A few issues cause this problem but they all come down to adhesion. It’s essential that a model has a solid foundation or else the whole print will fail.
Solution 1. Treat the print bed with an adhesive like hair spray or stick glue. Also try covering unheated beds in lightly textured tape, like blue painter’s tape.
Solution 2. Check to make sure your print bed is level and that your nozzle is neither too far nor too close to the print bed.
Solution 3. Slow the print speed down for the first few layers to give them time to cool off and adhere. If you’re still having trouble, try lowering the extruder temperature.
Problem #3: Stringing

By the end of a print, your model looks okay but is covered in strands of fly-away filament. These strings are easy enough to remove, but you can stop them from cropping up at all with a few tips.
Solution 1. The first thing to do is ensure that Retraction is enabled in your slicing software. This pulls filament back into the nozzle before moving across the model so that no left-over filament is drawn between spots.
Solution 2. When Retraction is set but you still experience stringing, try increasing the nozzle’s move speed (different from print speed). When the nozzle moves faster between areas of a model, there’s less time for strings to form.
Solution 3. If the above methods failed, try slowing down print speed and lowering the extruder temperature a little at a time.
Avoid stringing by planning models without large gaps between points.
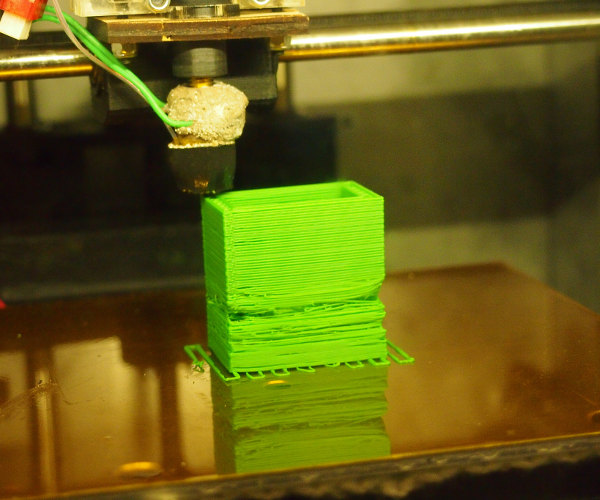
Problem #4: Warping
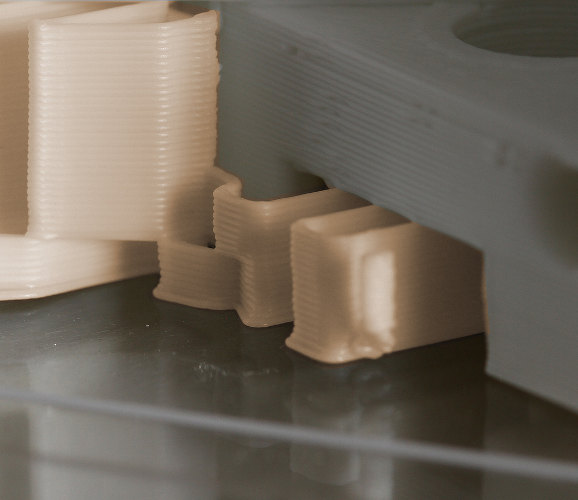
By Creative Tools
Warping is a problem with all types of filament because plastic becomes smaller when it cools. Notice how in the picture above, the bottom right of the model has shrunk and lifted off of the surface. Warped models are uneven or curled, sometimes lifting off of the print bed entirely. Thankfully, warping can be easily solved since temperature control issues are almost always the problem.
Solution 1. High-temp filaments, like ABS, require a heated print bed in order to properly adhere. Even PLA can benefit from using a heated print bed. Heated print beds not only aid with adhesion but also keep the bottom of the print from cooling (and warping) before the model is done. If you’re already using a heated print bed, make sure it’s at the right temperature and keeps temperature throughout a print.
Solution 2. Open-frame or semi-enclosed printers are subject to their environment, and so much as a draft of wind can alter a model’s finish. Build or buy an enclosure for your printer that will keep temperature and air pressure steady.
Problem #5: Rings and Waves
Instead of a smooth surface with barely visible lines, the exterior of your model has a distinct pattern of rings or waves. This usually isn’t enough to ruin a print but is obviously not ideal. The problem largely comes down to vibrations from motors, fans, and other moving parts impacting a print.
Solution 1. Mechanical failure a common culprit of a wavy finish, but the issue is not always easy to identify. A screw could be loose, or a belt could need replacing. Fans may also be to blame, as are worn bearings. Watch your 3D printer in action and try to follow excessive vibration back to its source.
Solution 2. If your 3D printer is working fine, perhaps print speed is to blame. Slow down print speed to help stabilize your extruder and greatly reduce the appearance of rings.
Problem #6: Elephant Foot (wide, flared base)
Heated print beds solve a lot of problems in 3D printing, but they cause some problems, too. One such issue is called elephant footing, where the first few layers become “squished”, flaring out wider than intended. Large and heavy models are most at risk, as the weight of the model pushes down on the base of not-quite-solid filament.
Solution 1: Especially if this is a new problem, the likely cause is an uneven print bed. Ensure that the print bed is level by following whatever instructions come with your 3D printer.
Solution 2: If you’re certain the print bed is level, it’s time to adjust some settings. Try raising the nozzle height ever slightly to stop the nozzle itself from interfering with the first layers of your print. You may also try lowering the temperature of the print bed so that the first layers dry more quickly. Finally, lower the first layer extrusion speed to allow the filament more time to solidify and adhere.
Problem #7: Layer Shifting
Shifting layers can be a big problem, causing your model to be completely ruined. Not all layer shifting is so dramatic, though. It may appear as a slight lean to your model, or you may notice a few askew layers in an overall print. No matter how big or small your layer shifting problem, the culprit is usually mechanical failure.
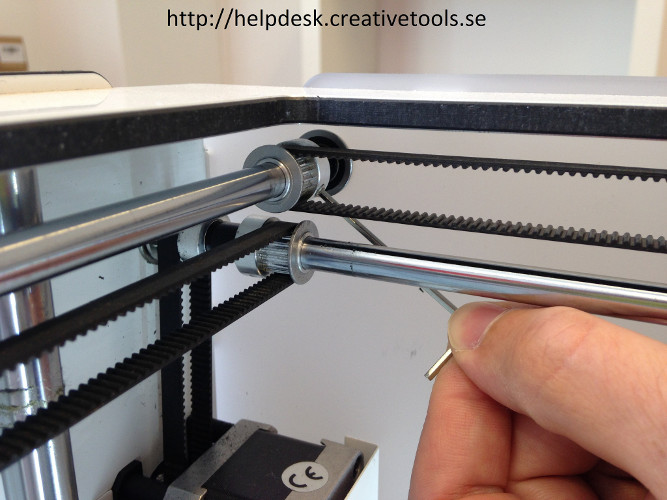
Solution 1: Check that the printer’s pulley belts are not too loose or two tight. Adjust belt tension as necessary.
Solution 2: A more pressing issue is guide rod misalignment. The extruder moves along these rods when the belts turn. If these rods are bent, even slightly, they must be replaced. The same goes for threaded rods and, less commonly, leadscrews.
Solution 3: The belts are taut, the rods are straight, but your layers are still shifting. Now look to the grub screws which attach your printer’s pulleys to the stepper motor. Make sure the grub screw, or set screw, is tight. When working properly, the pulley and stepper motor shaft move smoothly together.
Problem #8: Sagging/Failed Bridges
In 3D printing, bridges span between two points. Although bridges are built over thin air, small gaps up to 10cm are achievable by most 3D printers without supports. If conditions aren’t perfect, however, your bridge may sag, crack, or be stringy.
Solution 1: It’s important for unsupported bridges to solidify as quickly as possible. To achieve this, adjust slicer settings to ensure the bridge is built under proper conditions. Slow extrusion speed, raise fan speed, and lower extrusion temperature by 5-10°C for bridge building.
Solution 2: Bridges over 10cm are a challenge for most 3D printers. Use supports for long bridges. If you’re unsure of your printer’s capabilities, print a bridge test with varying lengths of bridges to check for tolerance.
Problem #9: Layer Separation
There are cracks between layers where the filament has not properly adhered to the previous layer. At worst, your model may separate along these cracks. At best, your model looks messy.
Solution 1: Layer separation is often cause by filament cooling too quickly, making it difficult for the next layers to adhere. Try raising the extrusion temperature, and/or the temperature of the print bed. If this doesn’t help, consider providing an enclosure to help control your model’s temperature. Similarly, adjust fan settings to give filament more time to solidify.
Solution 2: If temperature fluctuations are not the problem, slow print and move speeds to give filament longer to adhere to the previous layer.
Fixing your own 3D printer may be intimidating at first, but most troubleshooting solutions take less than 15-minutes to complete. As you can see from this guide, many issues can be solved by simply changing a few slicer settings. The more familiar you become with your machine, the better you become as a maker, so roll up your sleeves and go get your printer back up and running!


