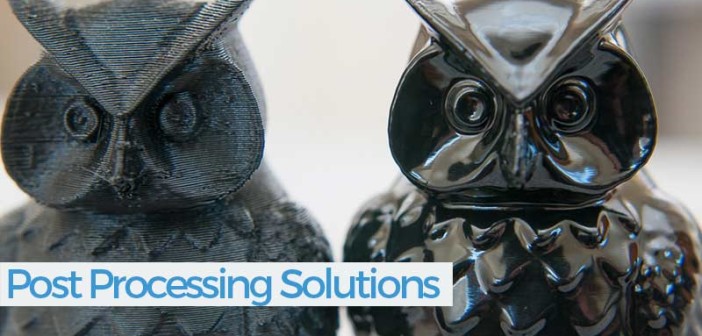
In every walk of life, it is the finish or reaching the goal that matters! Imagine you have designed a stunning 3D model and printed it..It still might need a little fine tuning. This is exactly where the post processing techniques come into play, converting your raw print into an extension of your imagination.
Basic Properties of Plastic 3D Printing Filament
Since plastic is currently the preferred material used in 3D printing, the techniques we discuss today shall revolve around plastics. Before performing any kind of a process on a material, understanding its basic physical and chemical properties is imperative. The plastics used in 3D printing are thermoplastics which become pliable or moldable above a certain temperature. They can be cut, filed, joined (glued and welded), dissolved and polished to achieve the required finish.

Post Processing Solutions
Let us look at each of the post processing solutions widely used in the 3D printing industry:-
Cutting and Trimming
This is the most basic post processing technique. You can get rid of the over hangs as well as the unwanted lengths with a wire cutter or any cutter which can cut flush against the surfaces. This is most useful in getting rid of supports if used. Most of the support filaments are soluble in water too.

Filing, Sanding and Polishing
The surface and sharp edges can be ground and levelled using files, sandpaper and polishing paper. Sandpapers are available in different grits. Always start sanding from coarser to finer and from dry sanding to wet sanding till you achieve the right finish.

Sanding is really useful to make your translucent prints become transparent. Similarly one can use polishing paper too. Use sanding and polishing disks along with rotary tools if the surface is wide and accessible. Tetrahydrofuran along with a polishing cloth can be used for polishing PLA objects

Gluing
This is one of the widely adopted post processing solutions. Most of the desktop 3D printers have low to average print areas. Joining smaller parts to make larger models is an effective technique. This technique involves multiple stages. Starting from choosing the right kind of glue for the filament used, preparation of surfaces, application of glue and attaching the pieces. The attached pieces are then left alone for curing and polymerization.

The most commonly used glue is cyanoacrylate or superglue. Cyanoacrylate has a tendency to harden faster and gives good strength too. However, it is known to react with the dye responsible for color in the plastic filaments, leading to darkening and discoloration. Epoxy resins are also used. These resins require mixing of components and time to cure. The parts are held together for the duration of curing.

Another method for joining ABS parts is to use ABS slurry. The slurry is prepared by dissolving ABS filament in Acetone in a ratio of 1:2. Slurry is prepared in the required color and quantity. This is applied between the parts. Upon drying, acetone evaporates and only the ABS joint remains.

Acetone Vapor Bath
This technique is similar to that of preparing an ABS slurry. ABS filament dissolves in Acetone. The ABS 3D print is placed in an enclosed container with a small amount of acetone in it. The acetone vapor then dissolves the layer lines created during the FFF 3D printing process and creates a glossy surface. This process should be done in a well ventilated area using non latex gloves. This process is not recommended for parts which might be used for serving food.

Conclusion
The entire design and 3D printing process culminates with the finishing applied to the 3D print. By choosing the right process, 3D prints can be definitely turned in to works of art. We have supplied you with the possibilities. Each of them requires careful consideration of the required time, effort and the final outcome that is envisaged. Choose the right process for yourself and happy printing!


